Lesson 2A: Warm-Up: Trace the AA Logo in Photopea
Learning goals
By the end of this warm-up:
- I can use a photo as a tracing guide.
- I can draw an editable vector line.
- I can make both sides of a mark look even.
- I can save a PSD and export an SVG.
Why this is useful
Your first sketch does not need to be perfect. Editable lines let you fix the shape while keeping the original idea.
This warm-up teaches the basic tools before you trace a logo with more parts.
What you will make
You will rebuild the hand-drawn AA mark with four clean vector lines:
- a left diagonal;
- a right diagonal;
- a vertical centre line; and
- a horizontal crossbar.
Before you start
Open Photopea in a browser. Open the AA reference photograph, or use another simple mark made from a few straight lines.
You will use:
- the Line Tool;
- Shape mode;
- the Move Tool; and
- the Layers panel.
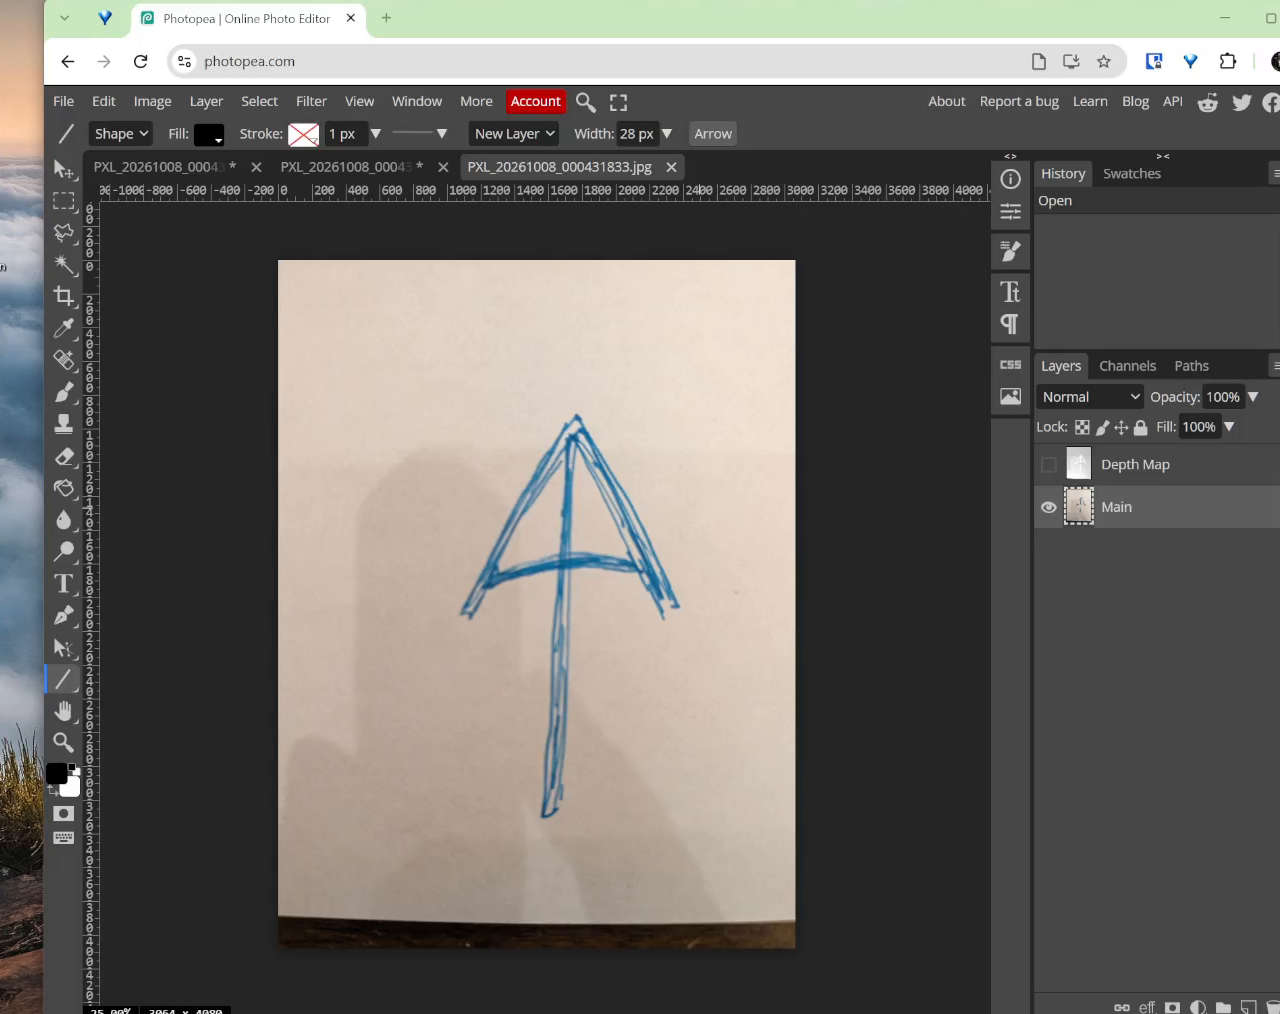
1. Open the sketch
Choose File > Open, then select the photograph. You can also drag the photograph onto Photopea.
Do not erase or paint on the photograph. It is only a guide.
2. Draw the first line
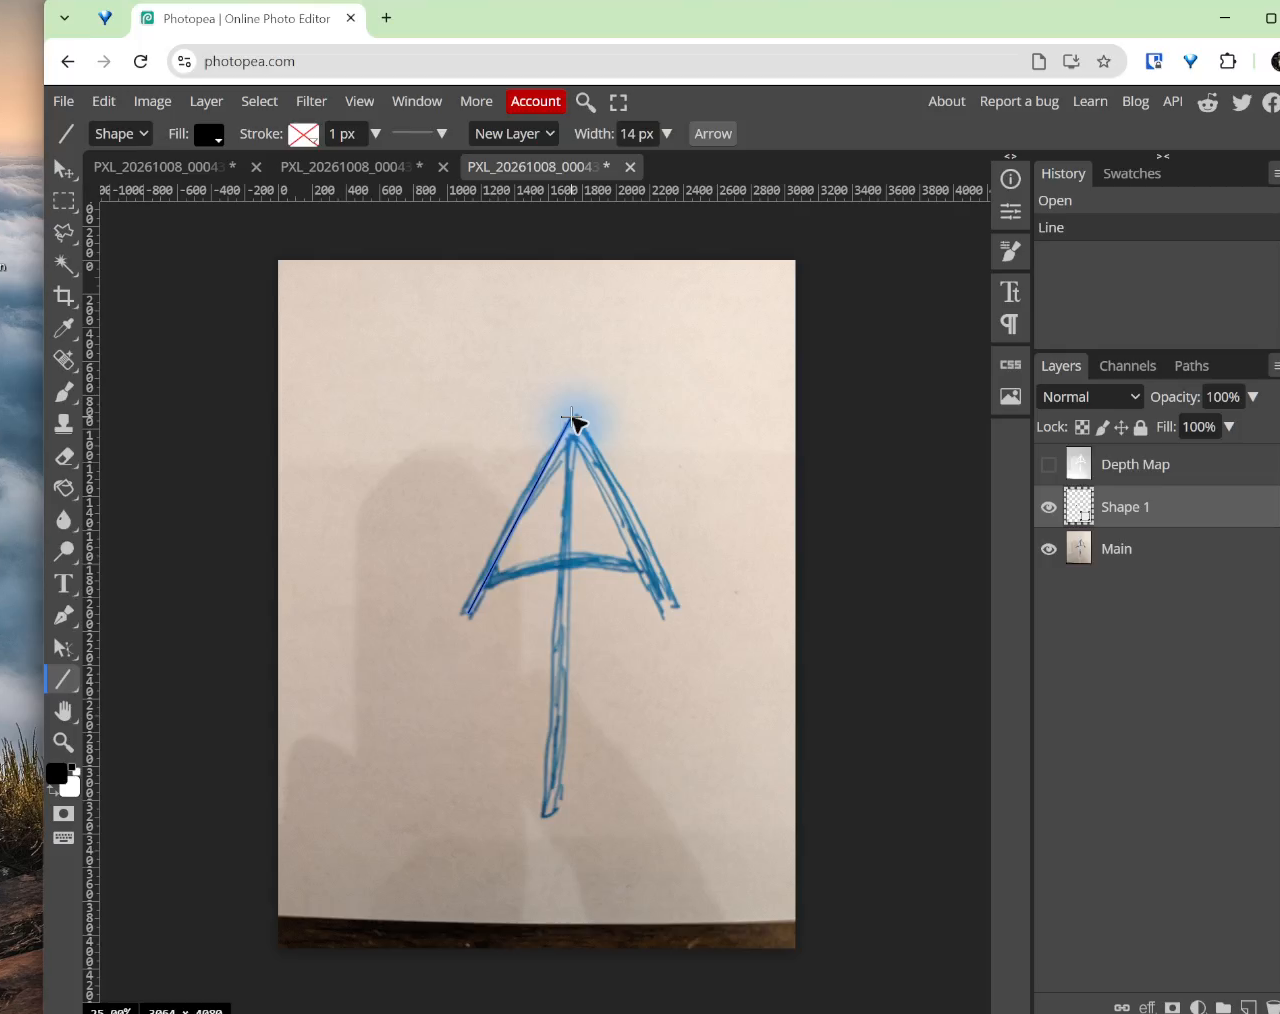
- Choose the Line Tool.
- Choose Shape in the top bar.
- Set the colour to black.
- Start with a line thickness near
14 px. - Drag over the left diagonal.
Photopea makes a new shape layer. A shape line stays sharp when it is resized.
3. Draw the other three lines
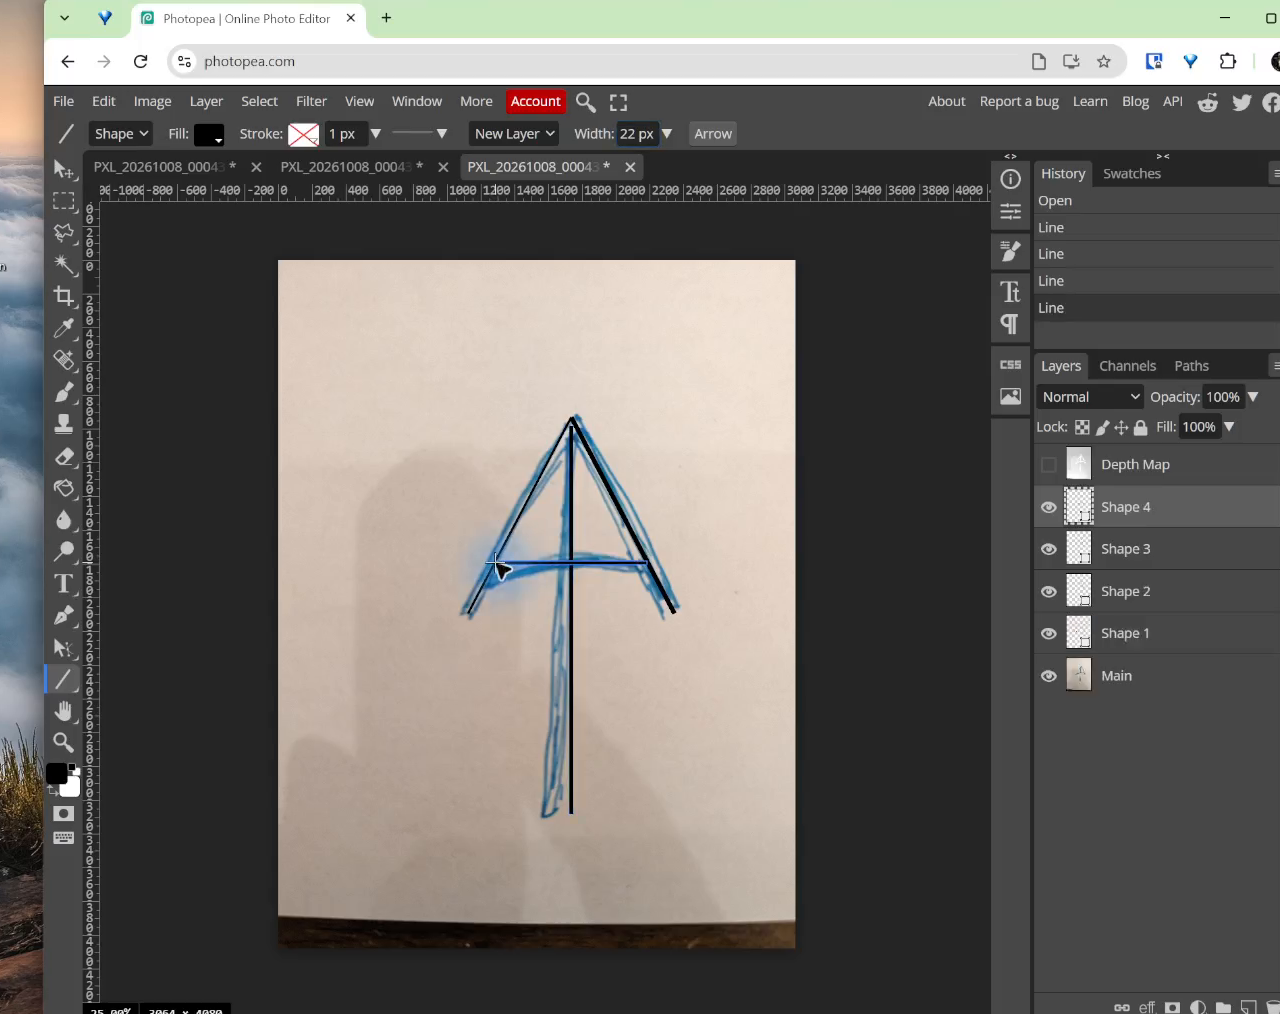
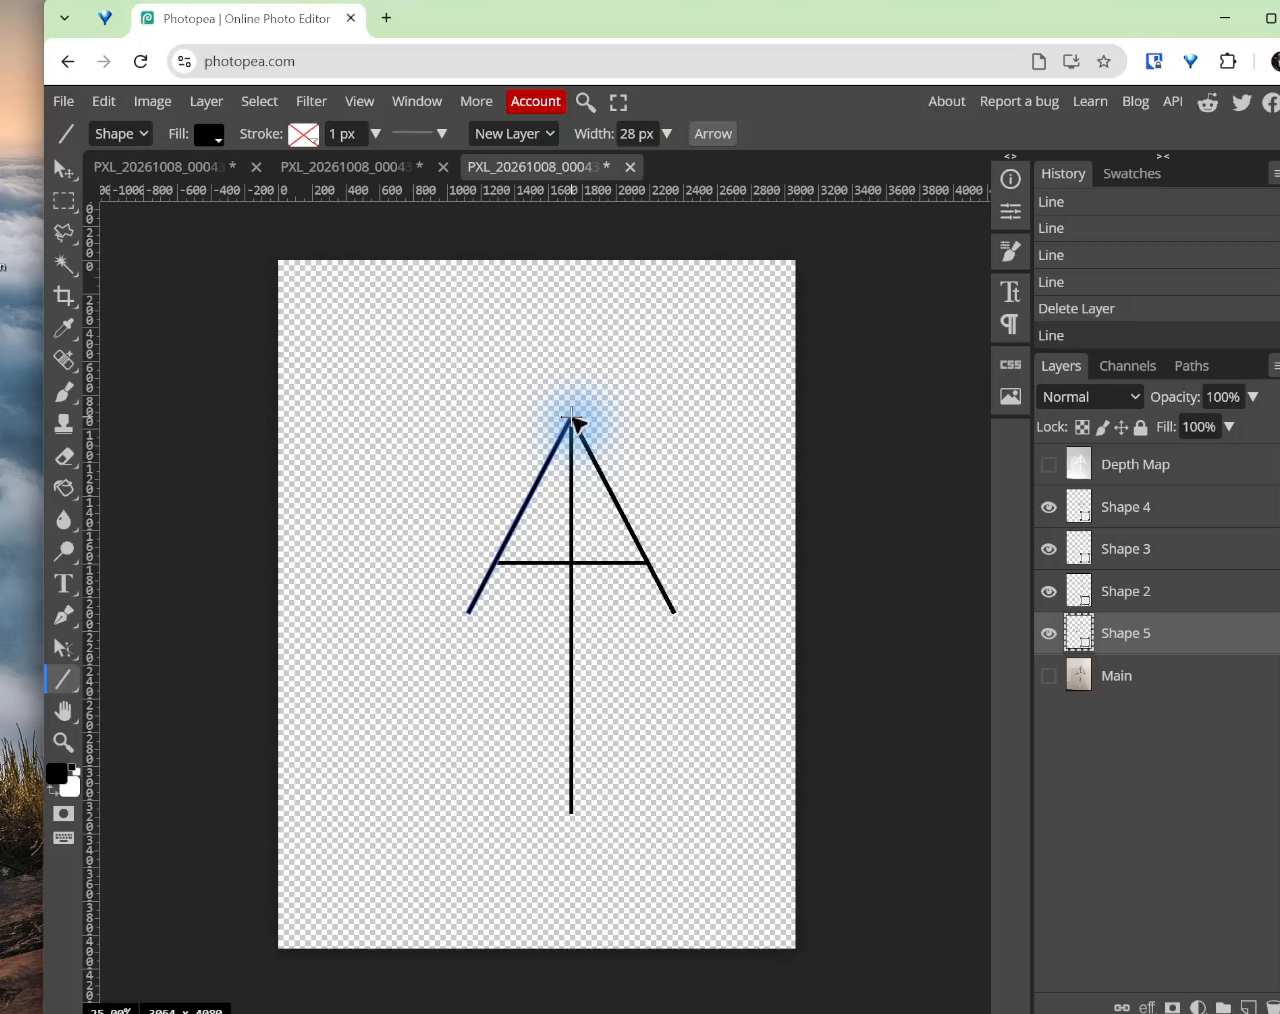
Draw the other diagonal, the centre line, and the crossbar. Keep each line on its own shape layer.
Check that:
- the two outside lines meet at one top point;
- the lower ends are at the same height;
- the centre line is straight;
- the crossbar is level; and
- the four lines have the same thickness.
4. Hide the photo and fix the mark
Click the eye beside the photograph layer. The grey-and-white checkerboard means the background is transparent.
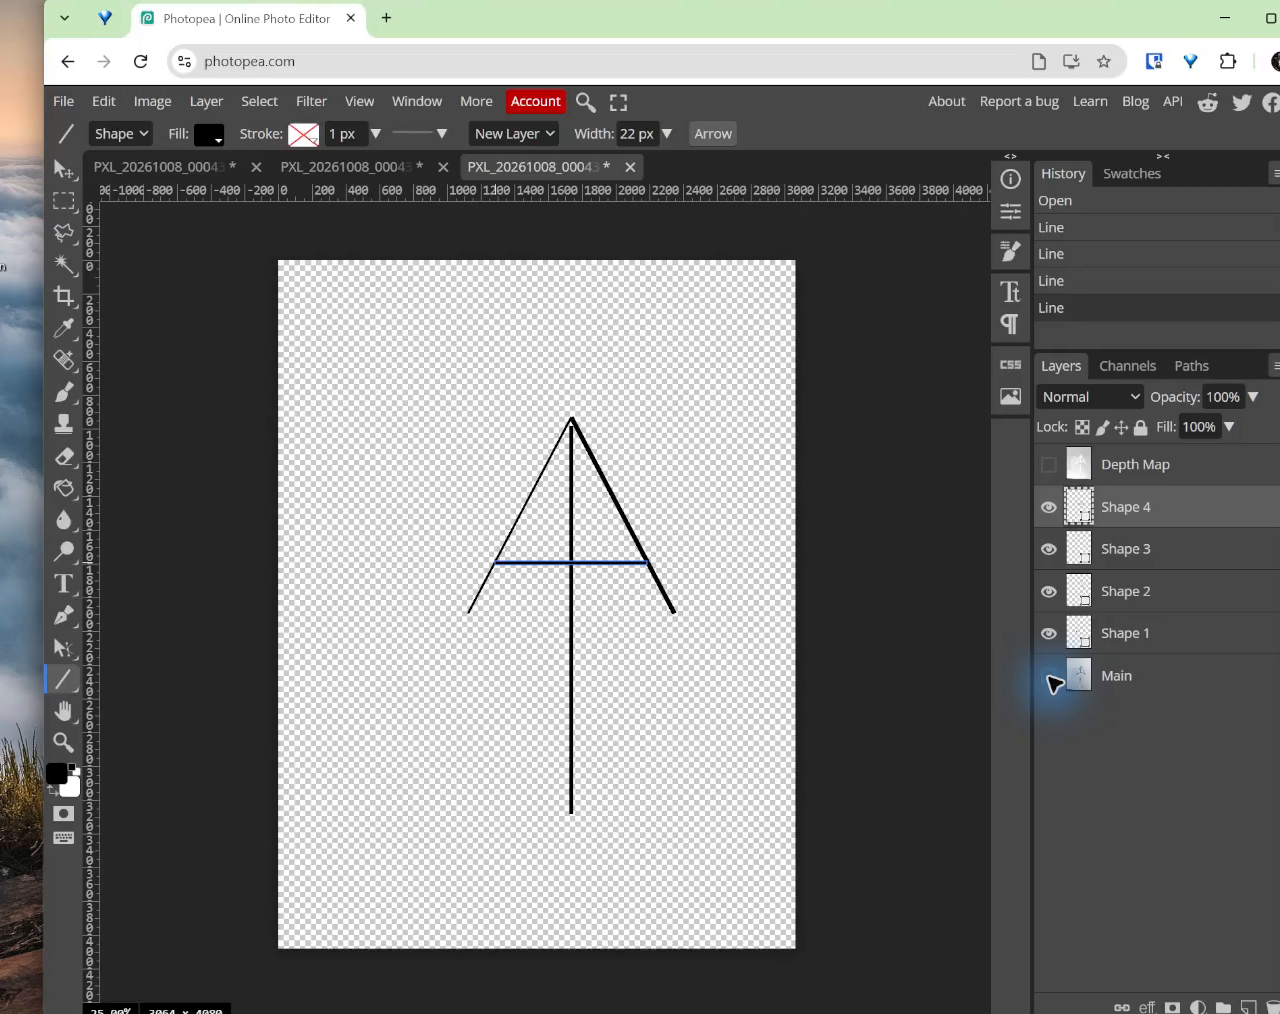
Use the Move Tool to move a whole line. Make small changes until both sides look even.
5. Save and export
Every filename must begin with your student number, followed by your last name. Replace studentnumber and lastname below with your own information.
- Choose File > Save as PSD.
- Name the working file
studentnumber-lastname-AA-logo.psd. - Keep the photograph hidden.
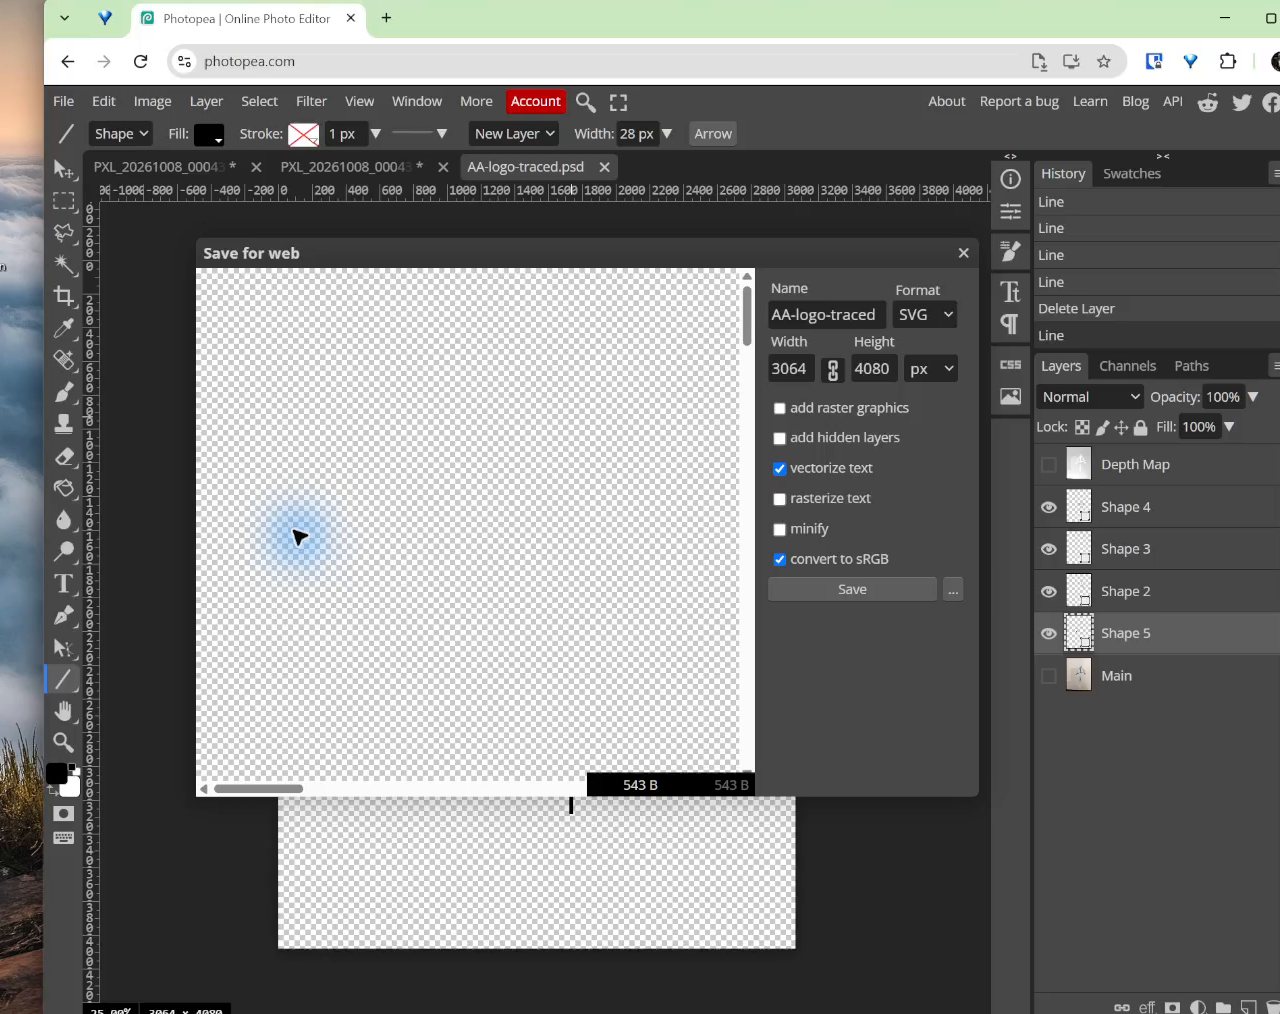
- Choose File > Export as > SVG.
- Leave add hidden layers off.
- Leave add raster graphics off.
- Name the file
studentnumber-lastname-AA-logo.svg. - Choose Save.
Example: 123456789-Smith-AA-logo.svg
Check your work
Continue when:
- the four lines are editable shape layers;
- both sides look even;
- the line thickness matches;
- the photograph is hidden; and
- the SVG contains only the finished mark.
Submit
Submit both files:
studentnumber-lastname-AA-logo.psdstudentnumber-lastname-AA-logo.svg
If Photopea downloads a file with the wrong name, rename it before you submit it. Keep the file ending, such as .psd, .png, or .svg.
- Open the Launcher, then open Files.
- Open Downloads.
- Select the file.
- Press
Ctrl+Enter. - Type the required filename, then press
Enter.
- Open File Explorer with
Windows+E. - Open Downloads.
- Select the file, then press
F2. - Type the required filename, then press
Enter.
- Open Files.
- Open Downloads.
- Select the file, then press
F2. If that does not work, right-click the file and choose Rename. - Type the required filename, then press
Enter.
Do not remove or change the letters after the final dot. For example, an SVG filename must still end in .svg.
Official help: Chromebook Files, Windows File Explorer, and Ubuntu Files.
Common issues
- A line is made of pixels: undo and choose Shape mode before drawing.
- A line is too thick or thin: select its shape layer and change the line thickness.
- The mark looks wrong without the photo: keep the photo hidden while you fix the spacing.
- The photo appears in the SVG: hide the photo and export again with raster graphics turned off.
Design curriculum: This warm-up builds basic vector drawing, visual checking, and file-export skills. Next, students use separate named shapes in the multi-layer worked example.
Summary
You used a rough sketch as a guide. You rebuilt it with four editable lines, made both sides look even, saved a PSD, and exported an SVG.
This was the warm-up. The next lesson uses different tools and named layers to trace a logo with several parts.
Previous: Lesson 1: Build the Nameplate Text. Next: Lesson 2B: Trace a Multi-Layer Logo.