Lesson 2B: Trace a Multi-Layer Logo in Photopea
Learning goals
By the end of this lesson:
- I can trace a sketch with separate vector shapes.
- I can name each layer so I know what it contains.
- I can colour each part without changing the other parts.
- I can save a PSD and export an SVG with separate parts.
Why this is useful
Most hand-drawn logos have more than one part. A separate graphics layer for each part makes the logo easier to fix, colour, move, and animate.
An SVG can also guide a laser cutter, embroidery machine, vinyl cutter, or other machine. Clean paths and clear names make the file easier to use later.
What you will make
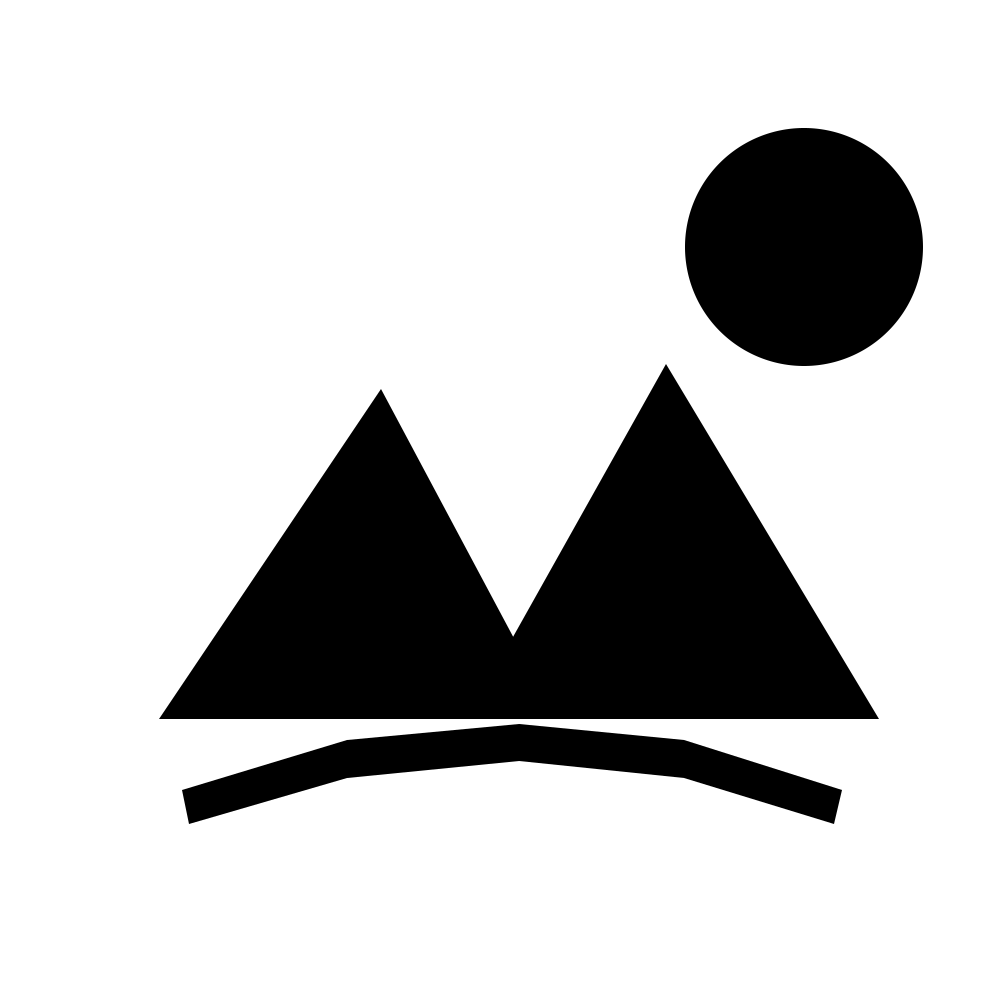
You will rebuild a small landscape logo. The two mountain peaks also look like the letters AA. The finished SVG has four separate parts:
SUNLEFT-ARIGHT-ARIVER
Before you start
Finish Lesson 2A: Warm-Up: Trace the AA Logo first.
Open Photopea in a browser. Download the rough landscape sketch, or use a clear photo of your own sketch.

You will use:
- the Layers panel;
- the Ellipse Tool;
- the Pen Tool in Shape mode;
- the Move Tool; and
- the colour picker.
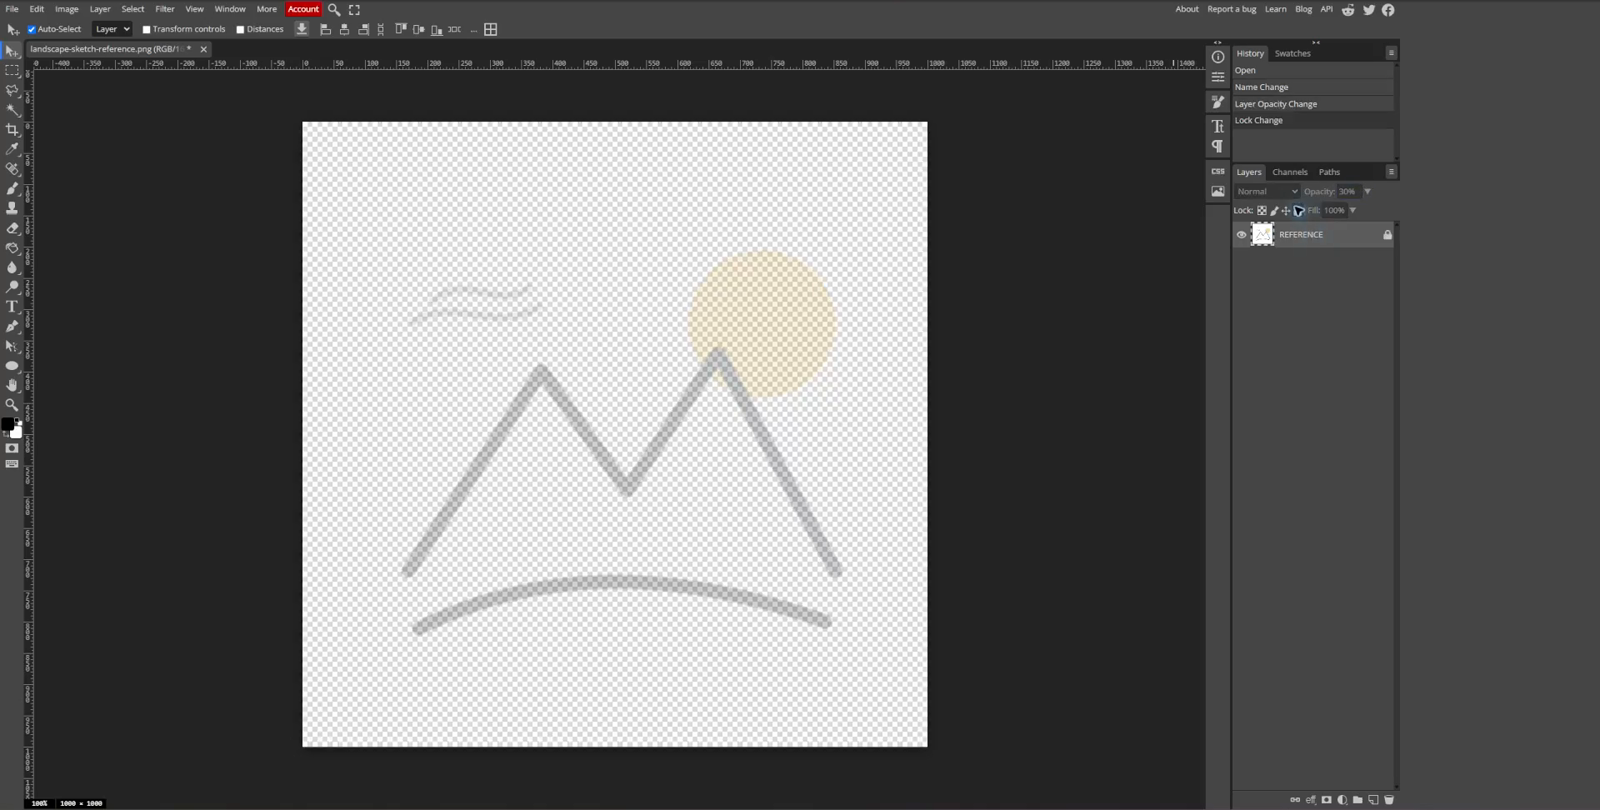
1. Fade and lock the sketch
- Open the sketch in Photopea.
- Rename the image layer
REFERENCE. - Lower its Opacity to about
30%. - Lock the layer.
The sketch should be light enough that new black shapes are easy to see.
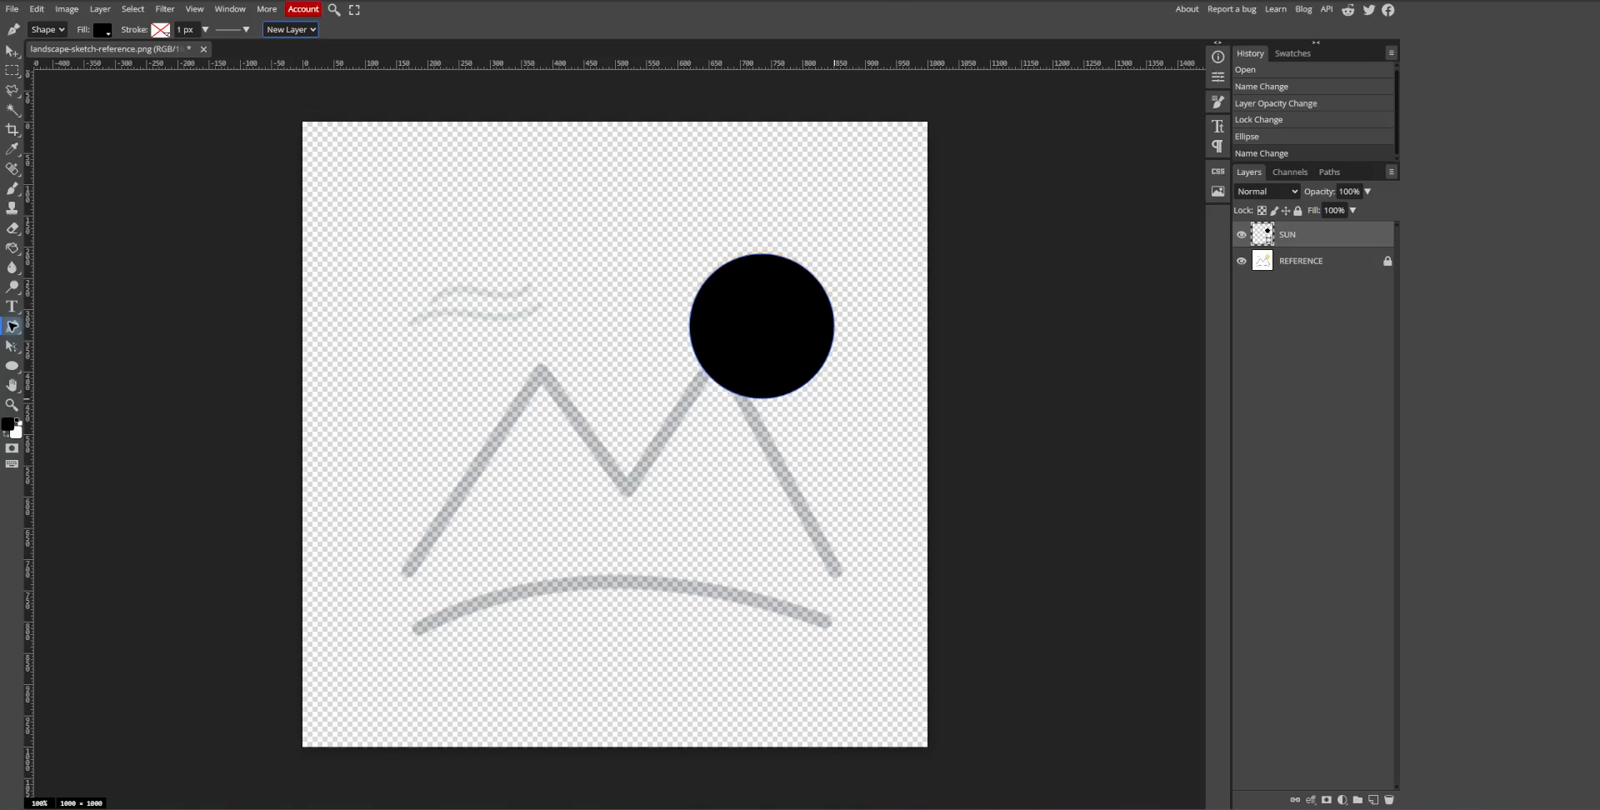
2. Make the sun
- Choose the Ellipse Tool.
- Set the tool to Shape mode.
- Use a solid black fill and set the stroke to None.
- Drag a circle over the sun.
- Rename the new layer
SUN.
Hold Shift while dragging if you want a perfect circle.
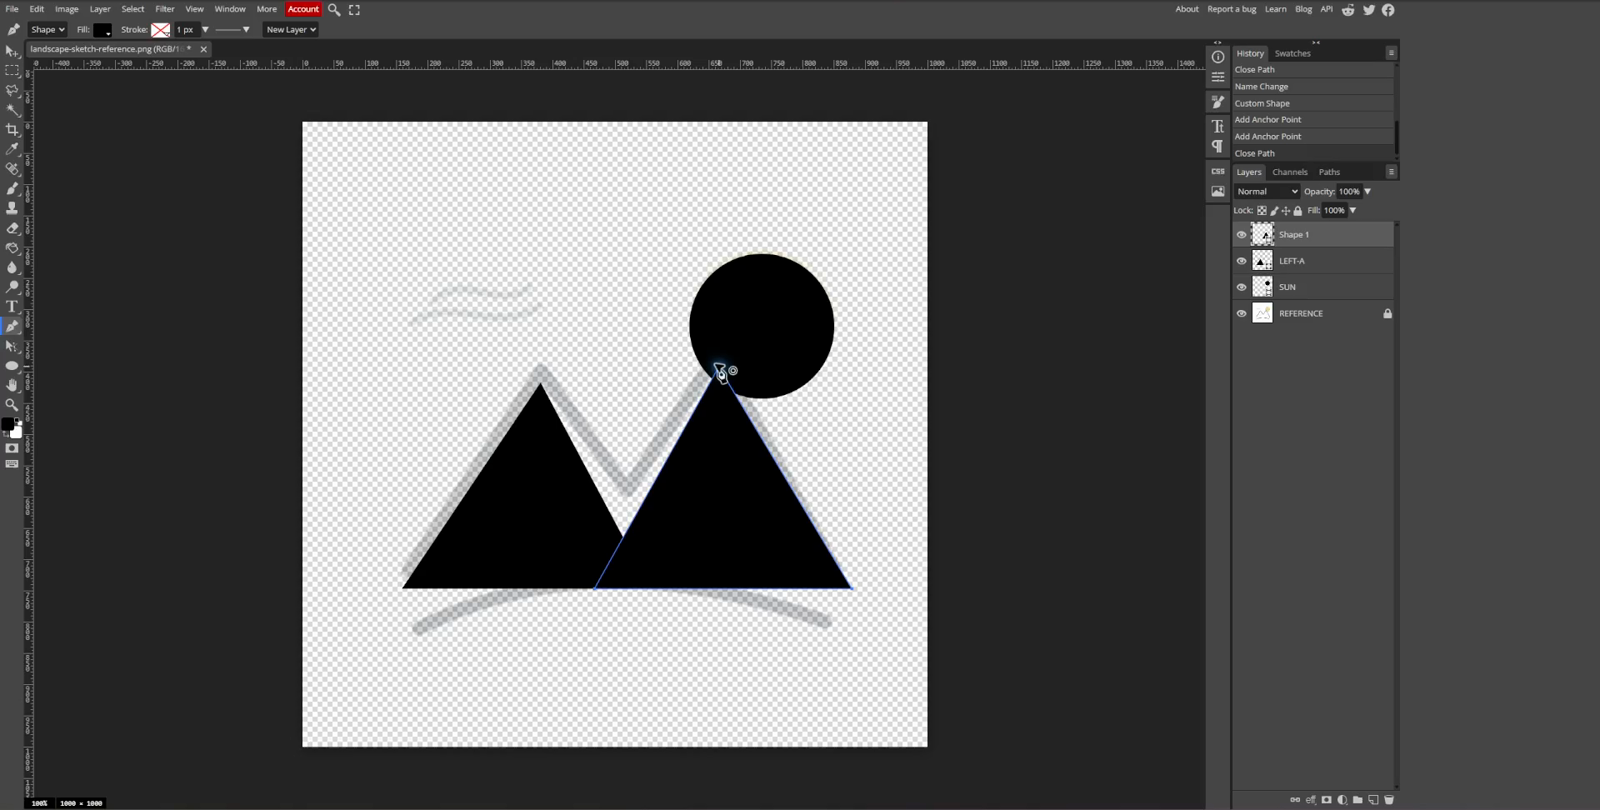
3. Make two mountain shapes
The two peaks are separate pieces. Do not trace the whole mountain as one shape.
- Choose the Pen Tool.
- Choose Shape in the top bar.
- Click anchor points at the bottom-left corner, the top of the first peak, and the centre valley.
- Click the first anchor point again to make a closed path.
- Rename the layer
LEFT-A. - Start a new shape layer.
- Trace the second peak and rename it
RIGHT-A.
Use only a few points. Fewer points make a cleaner shape.
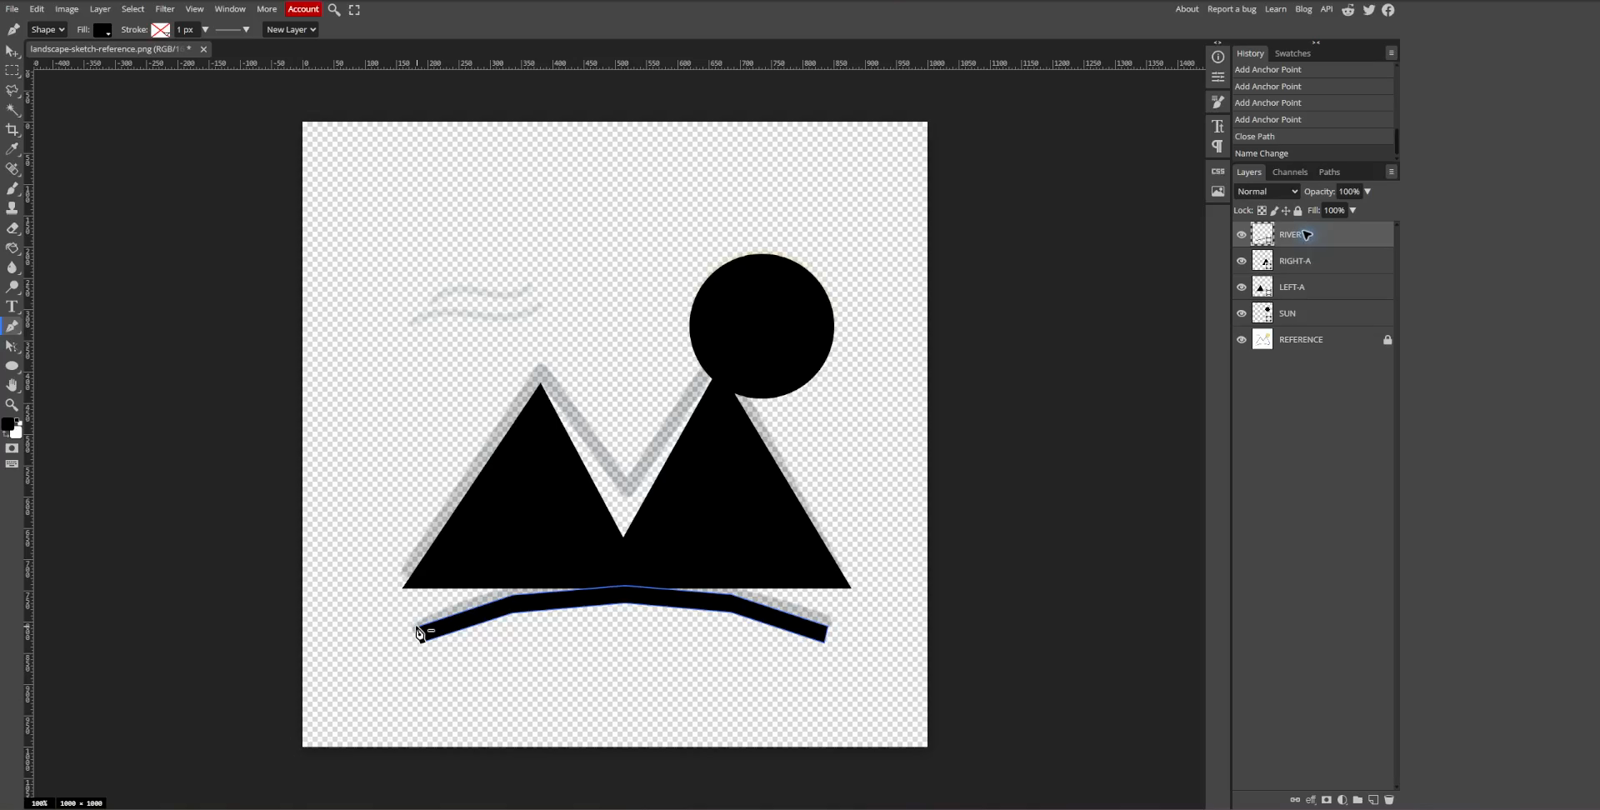
4. Make the river
The river is a thin closed shape, not a brush line.
- Start another new shape layer.
- Click several points along the top edge of the river.
- Click back along the bottom edge.
- Close the path by clicking the first point.
- Rename the layer
RIVER.
For a smoother river, drag while placing an anchor point to make a Bézier curve. A few well-placed anchor points usually look smoother than many small ones.
Keep the shape simple. The curve does not need many points.
5. Hide the sketch and check the shapes
Click the eye beside REFERENCE to hide the sketch.
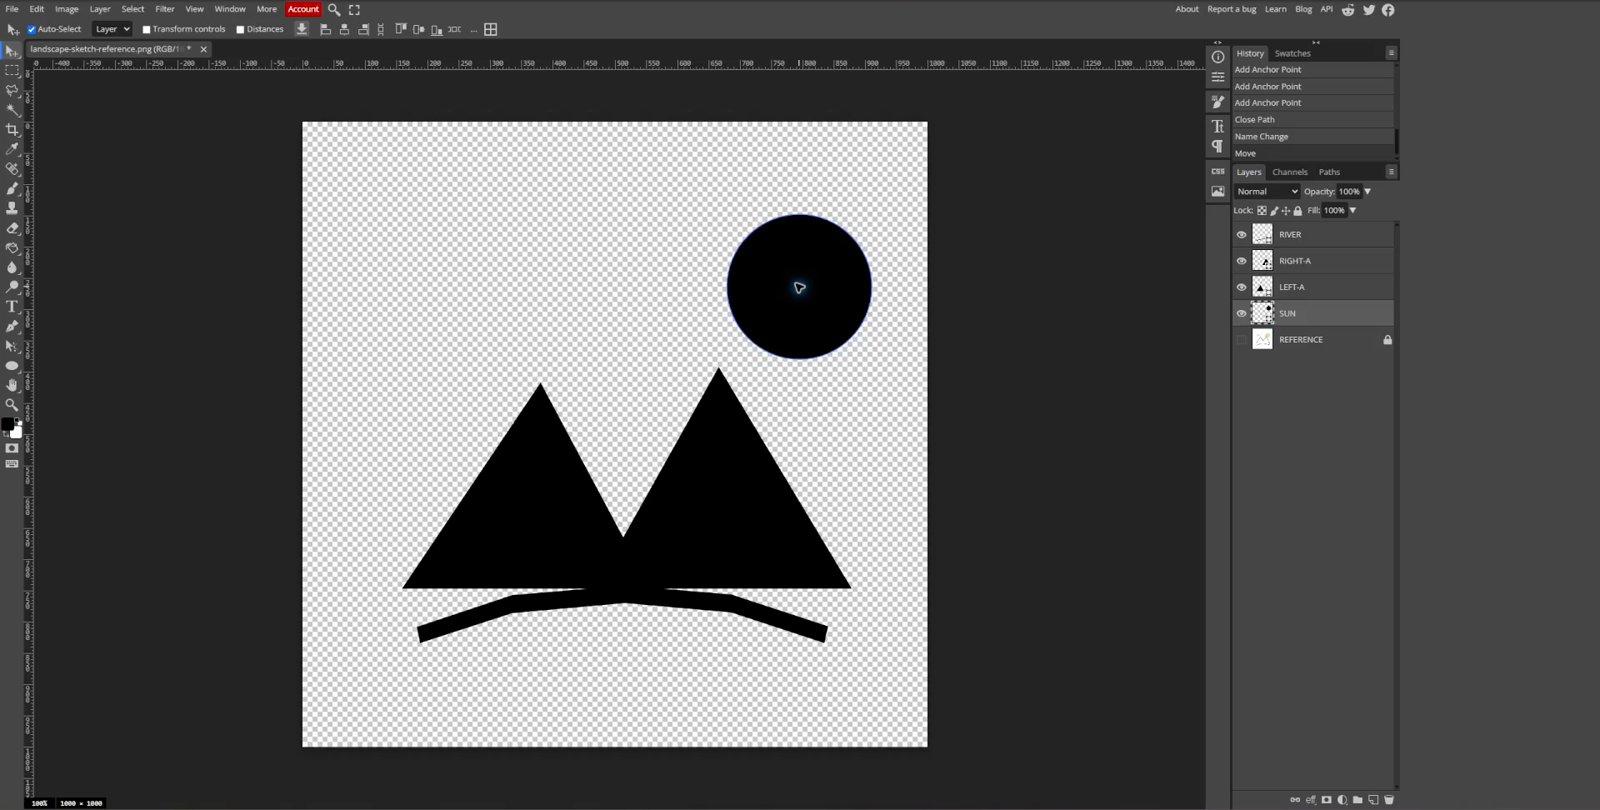
Check the logo in black before adding colour. Black makes uneven shapes, gaps, and unwanted overlaps easier to see.
Check your layers
The Layers panel should show:
RIVERRIGHT-ALEFT-ASUNREFERENCE, hidden and locked
These names become useful labels inside the SVG. In the next assignment, you can animate the sun, each peak, and the river separately.
6. Fix the size and spacing
Use the Move Tool to move a whole shape. Use the Direct Select Tool to move one point.
Check that:
- the two peaks look balanced;
- the centre valley is clear;
- the sun does not cover a peak;
- the river follows the mountain base; and
- no part is too close to the edge.
Make small changes. Look at the whole logo after each change.
7. Add colour at the end
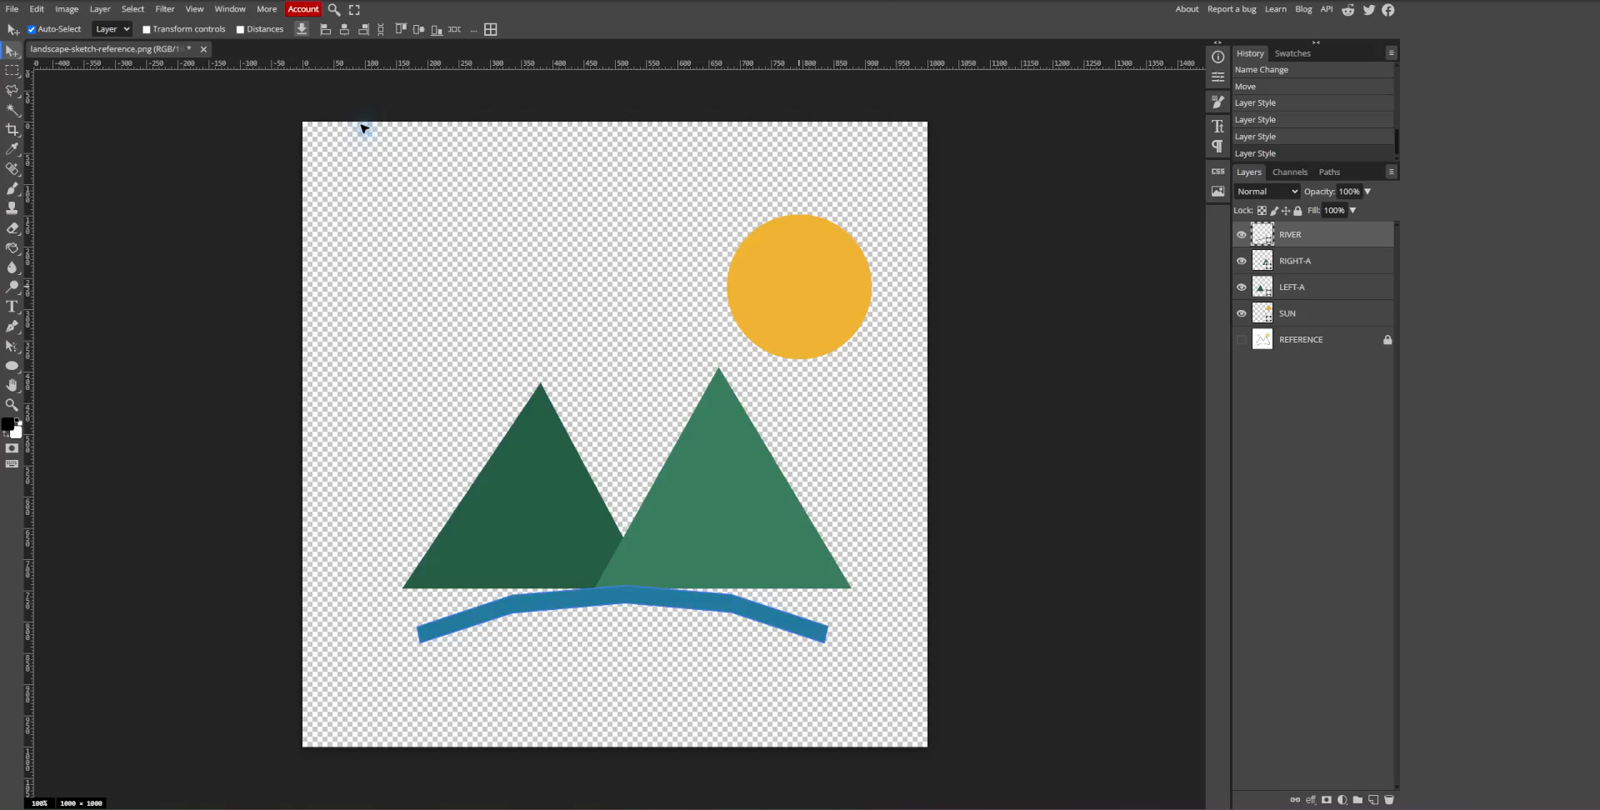
- Double-click the shape thumbnail beside
SUN. - Choose a colour and select OK.
- Repeat for
LEFT-A,RIGHT-A, andRIVER. - Use a small set of colours that are easy to tell apart.
Colour comes last because the black version makes shape problems easier to find.
8. Save the editable PSD
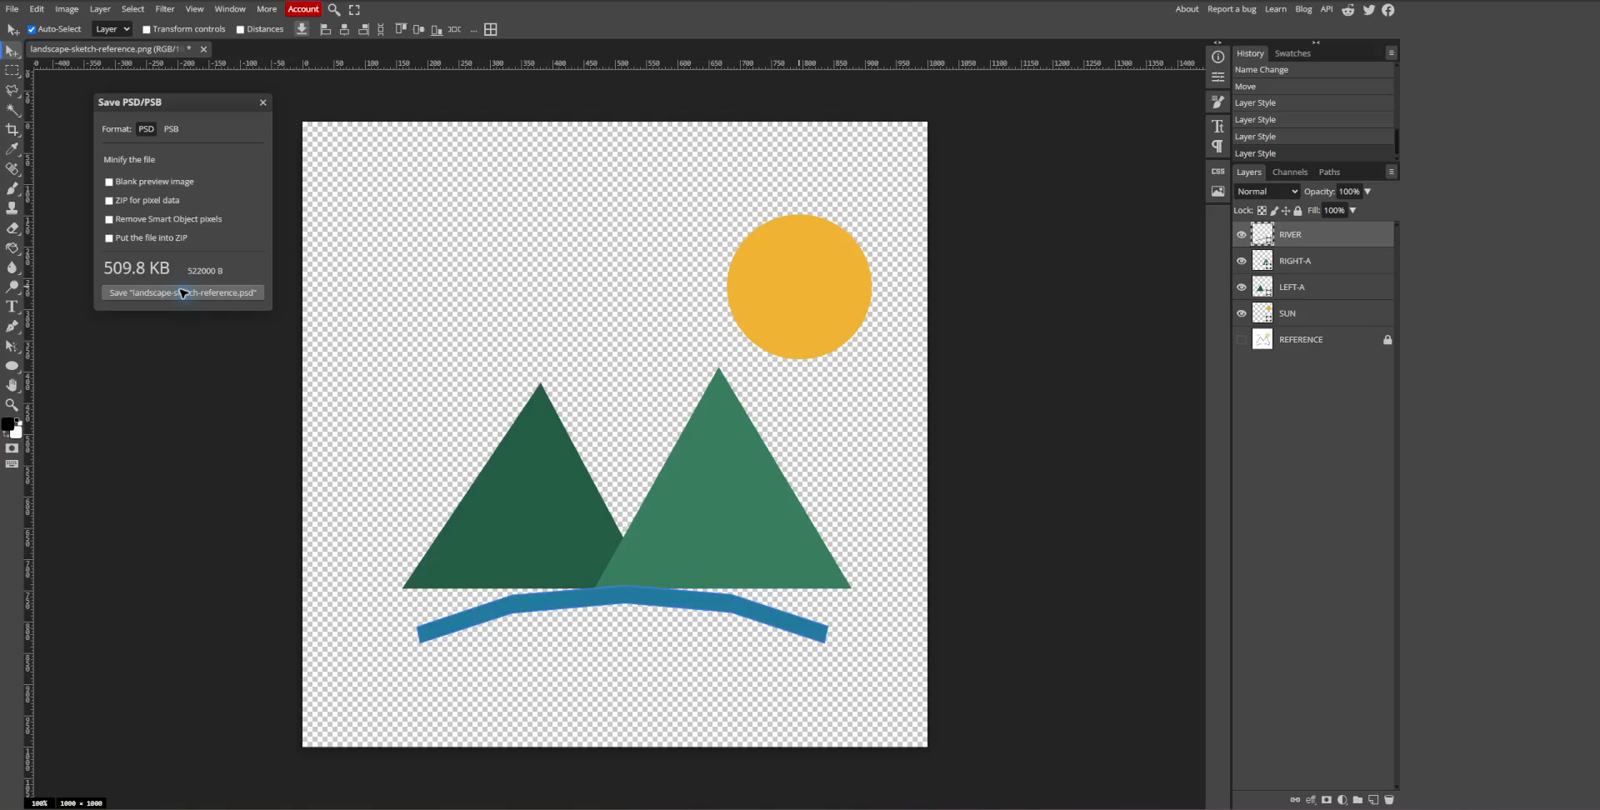
Choose File > Save More > Save PSD/PSB. Keep PSD selected. Name the file studentnumber-lastname-layered-logo.psd, then choose Save.
The Photoshop Document (PSD) keeps the reference and all four editable shape layers.
9. Export the SVG
- Keep
REFERENCEhidden. - Choose File > Export as > SVG.
- Name the file
studentnumber-lastname-layered-logo.svg. - Leave add raster graphics off.
- Leave add hidden layers off.
- Choose Save.
The empty background keeps its transparency, so the SVG does not gain a white rectangle.
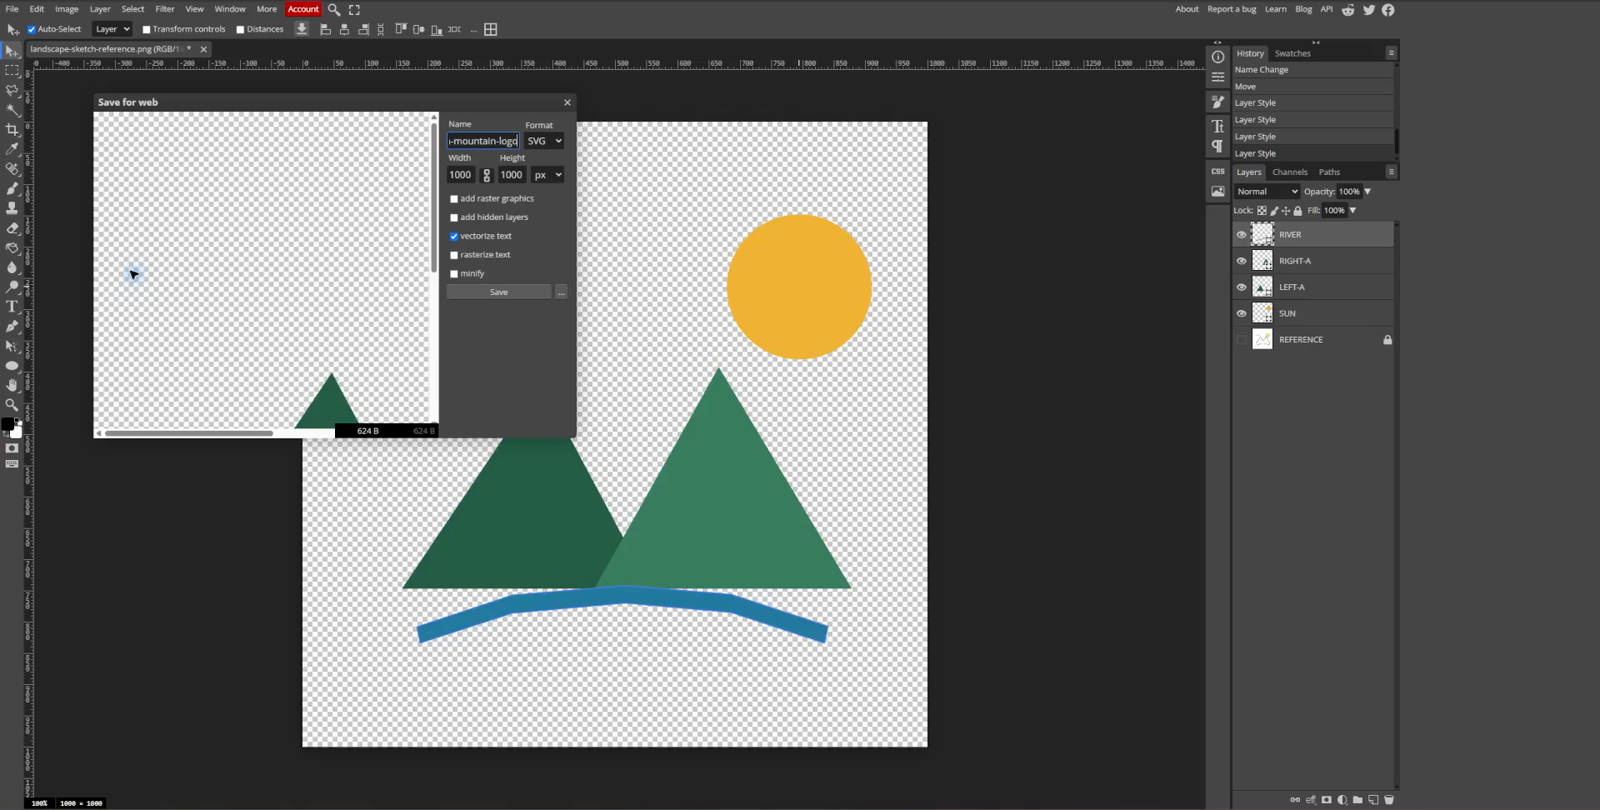
Open the finished four-part SVG to compare it with your file.
Check your work
Before you submit, check that:
- the PSD has four separate shape layers;
- every layer has a clear name;
- the reference is hidden and locked;
- the logo still works when the reference is hidden;
- the SVG contains only the finished artwork; and
- each part can be selected separately.
Submit
Submit:
studentnumber-lastname-layered-logo.psdstudentnumber-lastname-layered-logo.svg
Every filename must begin with your student number, followed by your last name. Replace studentnumber and lastname with your own information. Example: 123456789-Smith-layered-logo.psd.
If Photopea downloads a file with the wrong name, rename it before you submit it. Keep the file ending, such as .psd, .png, or .svg.
- Open the Launcher, then open Files.
- Open Downloads.
- Select the file.
- Press
Ctrl+Enter. - Type the required filename, then press
Enter.
- Open File Explorer with
Windows+E. - Open Downloads.
- Select the file, then press
F2. - Type the required filename, then press
Enter.
- Open Files.
- Open Downloads.
- Select the file, then press
F2. If that does not work, right-click the file and choose Rename. - Type the required filename, then press
Enter.
Do not remove or change the letters after the final dot. For example, an SVG filename must still end in .svg.
Official help: Chromebook Files, Windows File Explorer, and Ubuntu Files.
Common issues
- Everything is on one layer: undo the last shape, make a new layer, and draw that part again.
- The Pen Tool makes a line instead of a filled shape: choose Shape mode before you click points.
- The shape has too many bumps: remove points. Use only the points needed to show the main form.
- The sketch appears in the SVG: hide
REFERENCEand export again with add raster graphics and add hidden layers off. - The parts cannot move separately: check that every part is on its own shape layer.
- The colours look busy: use fewer colours and keep enough contrast between nearby parts.
Design curriculum: Builds vector drawing, layer organization, revision, SVG export, and animation preparation.
Summary
You traced one simple sketch as four named vector shapes. You checked the black shapes first, added colour at the end, saved an editable PSD, and exported an SVG whose parts can be animated separately.
This Level 3 example is a starting point. Improve the styling and make the final design your own.
Previous: Lesson 2A: Warm-Up: Trace the AA Logo. Next: Lesson 3: Combine the Logo and Nameplate.