Parametric Faux Enamel Pin / Jewellery | Later Onshape Project
Later parametric design challenge
Create an original pin, badge, pendant, charm or small teacher-approved wearable graphic. Use a personal logo, a new symbol or another teacher-approved original design. Simplify it for small-scale production, model it parametrically in Onshape, print it, add colour/finish safely, evaluate it and revise the source model.
For the current introductory project, use the Tinkercad Faux-Enamel Logo Earring or Brooch guide. This page is the later Onshape extension.
Inspiration, not an answer file
Study Turn 3D Printed Faux Enamel Pins Into Unique Jewellery as a process reference. Do not reproduce the author’s finished designs. Record the source and develop original artwork. Follow your school board’s safety guidelines and the course-specific information provided by your teacher; students in Mr. Andrade’s classes can find it in Google Classroom.
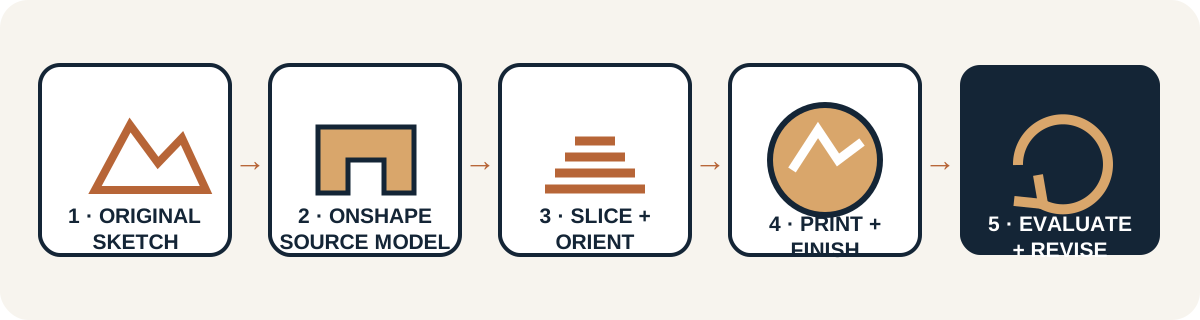
Design-to-revision process
- Sketch or choose an original graphic. State the meaning and intended wearer/viewer.
- Simplify it for small-scale production. Remove tiny counters, narrow islands and details that will not survive printing or finishing.
- Rebuild/model it parametrically in Onshape. Use constrained sketches and intentional dimensions instead of importing a finished 3D answer.
- Create raised or recessed regions. Make boundaries appropriate for the intended visual effect and finishing process.
- Confirm dimensions and thicknesses. Inspect overall size, base, details, holes and any attachment interface.
- Export STL or 3MF. Retain the editable Onshape source and identify the exported version.
- Slice. Inspect every layer, walls, top/bottom layers, infill, travel and estimated time/material.
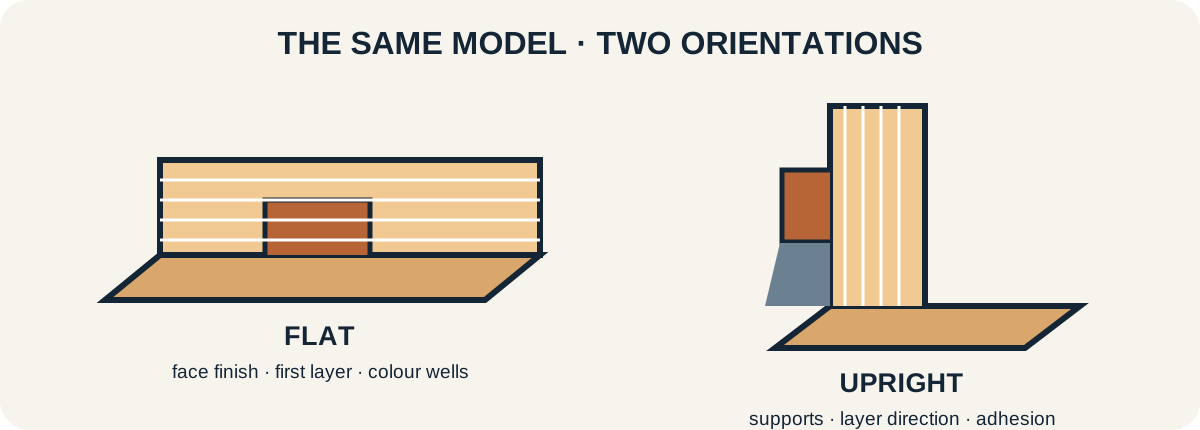
- Decide print orientation. Compare visual face quality, layer direction, supports, adhesion and strength.
- Print. Use the course-specific process provided by your teacher.
- Finish and colour. Use only teacher-approved methods and allow coatings/adhesives to cure fully.
- Evaluate. Check legibility, surface finish, colour boundaries, comfort, attachment and durability.
- Revise the source model. Tie at least one change to measured or observed evidence.
Minimum-detail and test strategy
Do not copy a universal minimum feature size. It depends on nozzle, layer height, orientation, material, slicer, finishing method and printer condition. Place several representative line widths, gaps or colour wells in a small test piece before committing to a full class batch.
Evidence to submit
- original sketches and source/licence notes;
- criteria and overall dimensions;
- Onshape source/version plus exported STL or 3MF;
- screenshot of constrained sketch and feature history;
- slicer preview and orientation justification;
- first print with observations;
- finishing/colour process notes;
- final evaluation and source-model revision.
Teacher approval is required for attachment hardware and finishing materials. Remove sharp edges and fragile projections. Do not use a classroom prototype where failure, ingestion, skin sensitivity or entanglement could create a hazard.
Review Slicing, Orientation & Supports and Tolerances & Functional Parts as needed.