Tinkercad Logo Stamp | Step-by-Step
Return to the Logo Stamp mission brief for the required dimensions, success criteria and submission list.
Prepare the logo in Photopea
The Tinkercad and Onshape pathways begin with the same artwork process:
- Open the original photograph, scan, PNG or JPG in Photopea.
- Choose Image - Vectorize Bitmap.
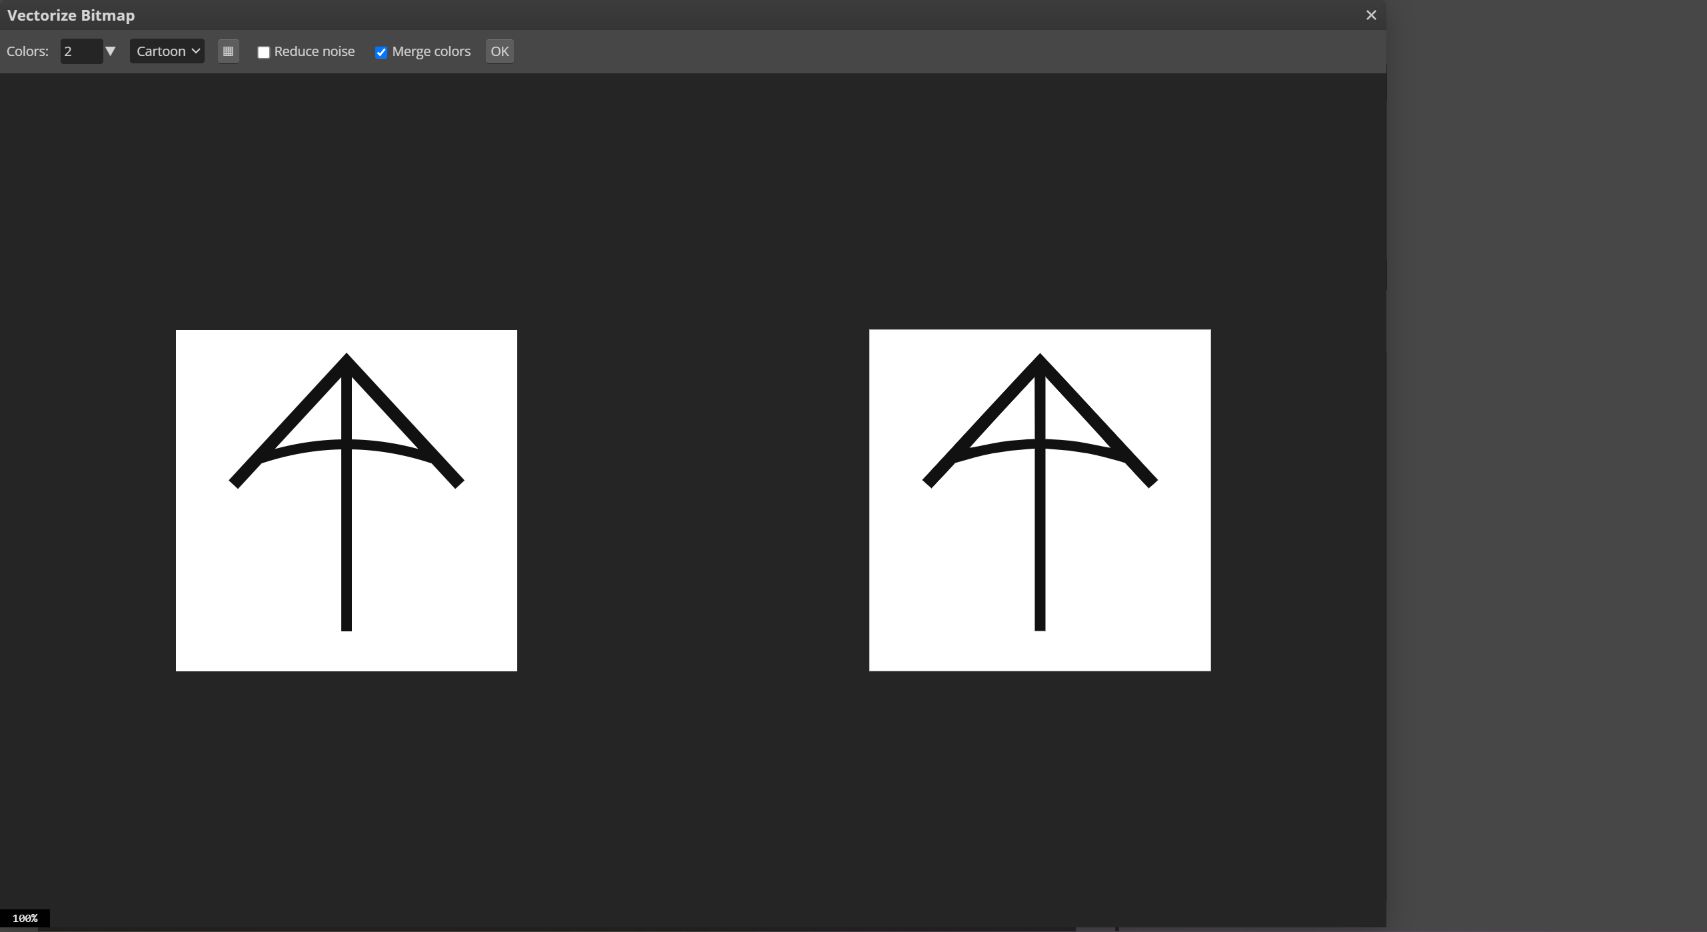
- For a simple black-and-white logo, set Colors to 2 and compare the source and vector previews.
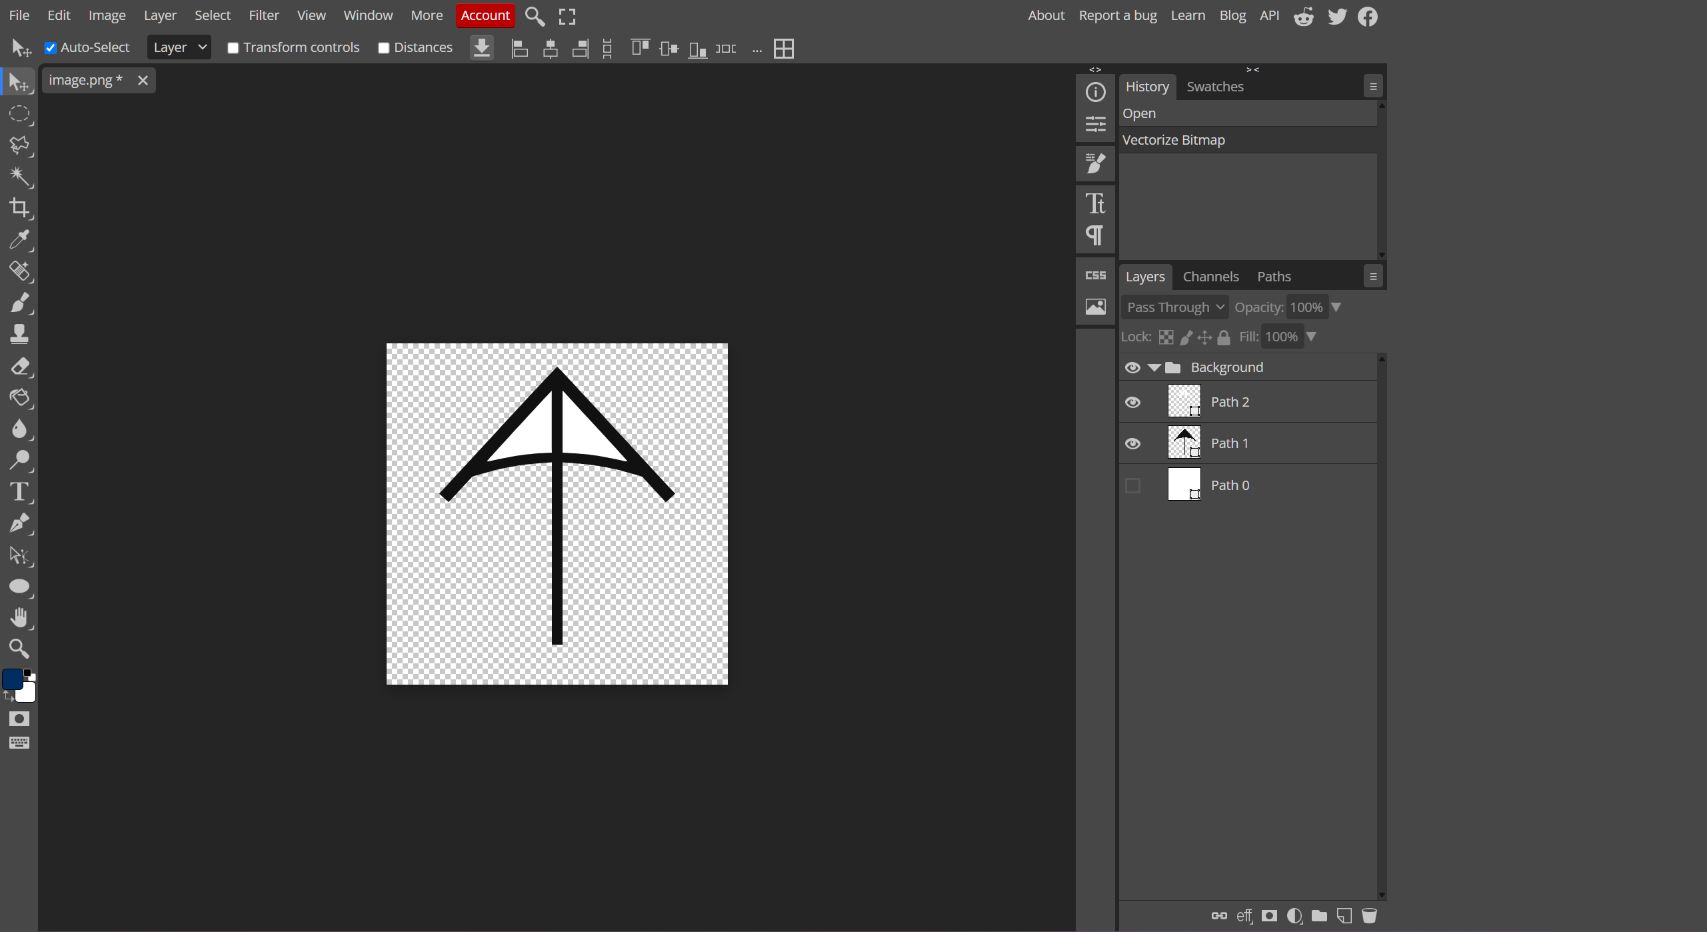
- Select OK, expand the generated vector group and hide the page-sized white background layer.
- Keep any smaller white Shape layers that create required holes or cutouts.
- Confirm that the checkerboard appears around the logo and that important openings remain clear.
- Choose File - Export as - SVG and leave add hidden layers turned off.
For the complete explanation of raster layers, Shape layers, background removal and SVG export, use Part A of the Photopea-to-Onshape guide.
Tinkercad imports SVG files directly. After the clean SVG is exported from Photopea, continue with the steps below. Do not convert the artwork to DXF for this pathway.
Step 1 - Start and name the design
- Sign in to Tinkercad.
- Select Create - 3D Design.
- Rename the design
lastname-logo-stamp. - Set the Snap Grid to 0.5 mm.
Step 2 - Make the backing coin
- Drag a Cylinder onto the workplane.
- Set its width and length to 38 mm.
- Set its height to 4 mm.
- Increase the cylinder sides so the edge appears smooth.
- Leave the back flat. Do not add a handle.
Step 3 - Import your original logo
- Select Import.
- Choose the transparent SVG exported from Photopea.
- Select the Art import type when Tinkercad asks how to interpret the file.
- Import it at no more than 30-32 mm wide.
- Keep the width and length proportions linked while resizing.
- Set the logo height to 2 mm.
- Remove or simplify details thinner than 1.2 mm.
If Tinkercad fills openings incorrectly, return to the SVG and repair the paths before continuing. Do not cover the problem with extra shapes.
Step 4 - Mirror the stamp face
- Select only the logo.
- Choose Mirror.
- Select the left-right mirror control.
- Confirm that letters and directional symbols now look backwards on the stamp face. They will read correctly in the impression.
Step 5 - Place the relief on the coin
- Select the logo.
- Raise it 4 mm above the workplane so it sits on the backing.
- Select the logo and cylinder together.
- Choose Align.
- Select the two centre alignment dots.
- Confirm there is at least 3 mm of clear backing around the logo.
Step 6 - Inspect before grouping
Orbit to the top, front and right-side views.
Check that:
- the backing is 4 mm thick;
- the logo rises 2 mm above the backing;
- the logo is mirrored;
- no part hangs beyond the circle;
- small gaps remain open; and
- the back remains flat.
Select everything and press Ctrl + G only after these checks pass.
Step 7 - Export
- Select the grouped stamp.
- Select Export.
- Choose The selected shape.
- Choose STL.
- Rename the file
lastname-logo-stamp.stl. - Open it in the class slicer and inspect every layer.
For the rigid class prototype, print with the flat back on the build plate and the raised logo facing upward. A flexible ink-stamp version uses a teacher-selected material and printer-specific orientation.
Step 8 - Test and revise
Make one impression in teacher-approved modelling material. If the result is backwards, incomplete, crowded or too faint, return to Tinkercad and revise the source before printing again.
Record the first result and the change you made. A successful print without evidence of testing is not the complete mission.