Technological Education Resources Technological Education Resources Tech Edu
  • Educator Resources
    • General Slides
    • General Materials
    • General Design & Fabrication
    • Computer Engineering Notes
  • Classes
    • TAS Slides
    • TEJ Slides
    • TTJ / TTS Slides
  • Glossary
  • Lore
  • About
  1. First Laser Projects
  • General Design & Fabrication Home
  • 1. Culture and Land-Based Learning
    • 1. Grandmother Moon, Seasons, and Turtle’s Back
    • 2. Land Lettermark
  • 2. S.O. N.I.C.E. Design Process
    • 1. Understand the Situation & Opportunity
    • 2. Record User Needs
    • 3. Necessities and Nice-to-Haves
    • 4. Rank Priorities
    • 5. Investigate and Inquire
    • 6. Create and Communicate
    • 7. Evaluate and Repeat
  • 3. Emotions and Visual Communication
    • 1. Fear and Anxiety
    • 2. Anger
    • 3. Disgust
    • 4. Envy
    • 5. Jealousy
    • 6. Guilt
    • 7. Shame
    • 8. Happiness
    • 9. Love
    • 10. Sadness
  • 4. Logo Design in Photopea
    • 1. Build the Nameplate Text
    • 2. Warm-Up: Trace the AA Logo
    • 3. Trace a Multi-Layer Logo
    • 4. Combine Logo and Nameplate
    • 5. Design Your Own Name Tag
  • 5. Logo Animation
    • 1. Bring Your Brand to Life: Animate Your Logo
  • 6. Accessible Design
    • 1. Access and Alt Text
    • 2. Fonts and Text Effects
    • 3. Understanding Colour
    • 4. Contrast and Output
  • 7. Laser Cutting and Fabrication Tools
    • 1. Make It Stand
    • 2. Measure and Place
    • 3. Material Fit and Calibration
    • 4. Assemblies and Hybrid Fabrication
    • 5. Laser-Cut Assembly, Adhesives & Finishing
    • 6. Wall and Bench Tool Module
    • 7. Design and Fabrication Capstone
  • 8. Making the Phone Holder
    • 1. Choose Your Phone Holder
    • 2. CAD You Need
    • 3. Tools and Machines
    • 4. Build Steps
  • 9. Advanced Making: Stamp or Faux-Enamel Jewellery
    • 1. Mission 2: Logo Stamp
    • 2. Tinkercad Logo Stamp
    • 3. Onshape Logo Stamp
    • 4. Mission 3: Tinkercad Faux-Enamel Brooch
    • 5. Onshape Faux-Enamel Jewellery
  • CAD Tools
    • Fabrication Plate Builder
    • Laser-Cut Leg & Support Builder
    • Tool Organizer Gallery
  • Laser-Cutting Files and Resources

On this page

  • The workflow
  • Before fabrication
  • Project 1
    • Name + logo engraving
    • First task
    • Three layouts worth testing
    • Ready to engrave?
  • Project 2
    • Make the name tag stand
    • First task
    • Compare, then choose
    • A good stand
  • Project 3
    • Measure + organize
    • HOLE or CIRCLE PART?
    • First task
    • Ready for the complete layout?
  • Project 4
    • Auto-shop pill-bottle organizer
    • Four reference systems
    • Example parameters
    • Assembly review
    • Ready to fabricate?
  • Transfer
    • Your next organizer
    • Evidence, not decoration

First Laser Projects

Measure · build · test · revise

Author

Technology Commons

Project this page one card at a time or print it as a compact teacher sequence. Each card answers: what are we making, why, what is new, what is the first task, what does good look like, and are we ready to fabricate?

The workflow
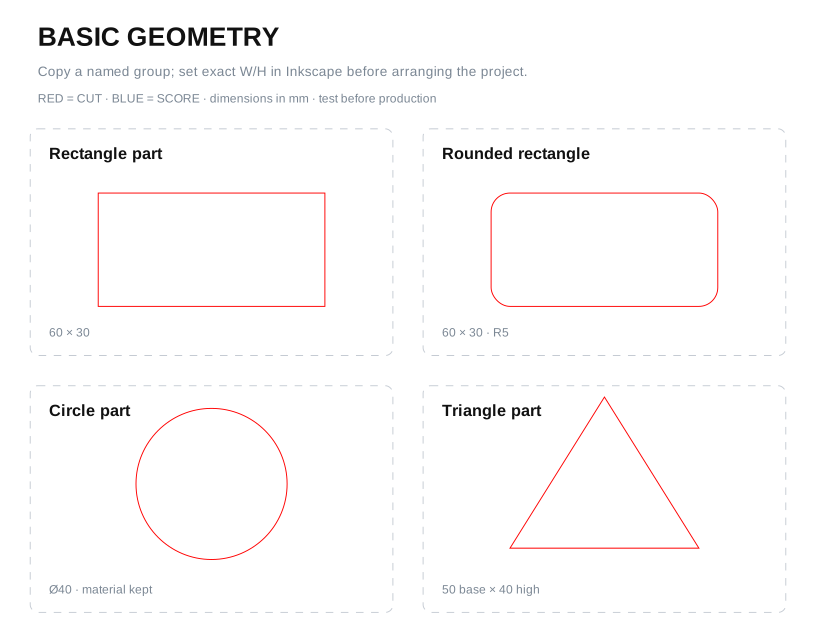
Basic geometry component palette

Paper plan → measure → exact parts → layout → fabricate → test → revise

Before fabrication

File

  • mm + correct page size
  • one outline per cut
  • named parts
  • CUT / SCORE / ENGRAVE checked

Shop

  • follow school board safety guidelines
  • use the course-specific process from your teacher
  • Mr. Andrade’s students: check Google Classroom
  • confirm the machine preview matches the file

Project 1

Name + logo engraving

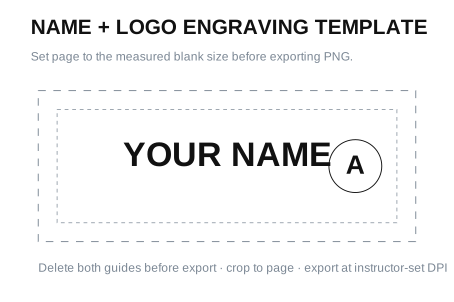
Today we make one readable identity design for a teacher-supplied, pre-cut wood blank.

New skill: fitting raster artwork to a measured physical object.

First task

  1. Measure the blank: width × height.
  2. Open the editable template.
  3. Set the page to the measured size.
  4. Add name + original logo.
  5. Export the page as PNG.

Three layouts worth testing
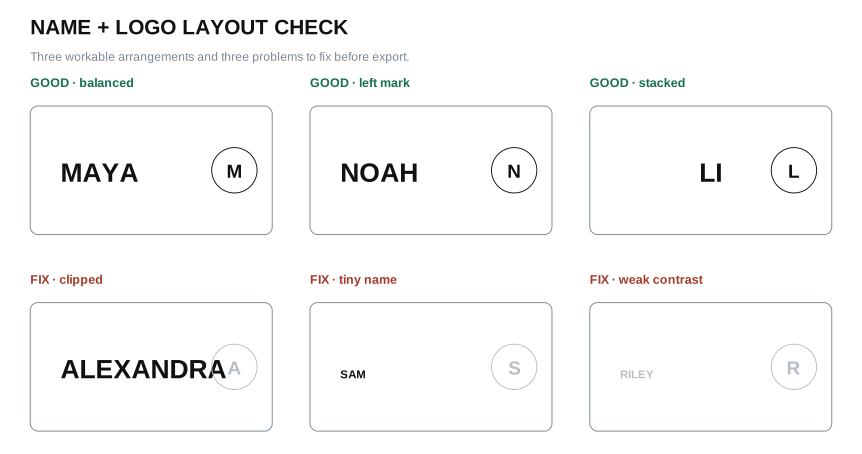
Examples of balanced, left-mark and stacked layouts plus common layout problems

Ready to engrave?

  • Name reads at arm’s length.
  • Logo and name have clear hierarchy.
  • Artwork stays inside the agreed margin.
  • No guide rectangle appears in the PNG.
  • PNG crop, orientation and contrast were checked.

Project 2

Make the name tag stand

Today we turn a flat graphic into a stable object.

New skill: choosing support geometry from a load and footprint.

First task

Draw front, top and side views. Mark:

  • plaque size and thickness;
  • support footprint;
  • slot or fastener;
  • likely tipping direction;
  • one dimension that needs a test.

Compare, then choose
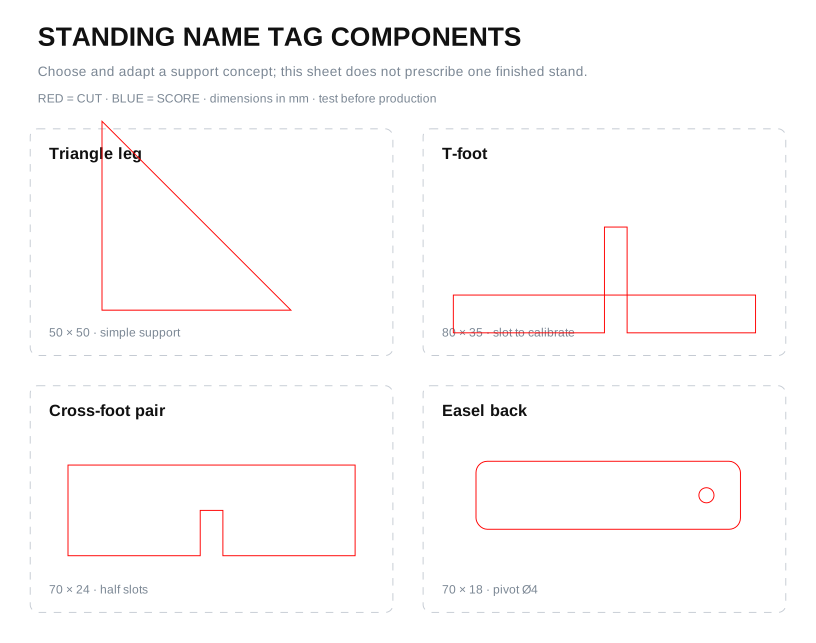
Four standing name tag support concepts

A good stand

  • stays upright after a light desk bump;
  • keeps centre of mass over its support area;
  • does not hide the engraving;
  • assembles without forcing parts;
  • records what changed after the cardboard or scrap test.

Project 3

Measure + organize

Today we create repeated openings from a real object, not from a guess.

New skill: controlling diameter, clearance, spacing and edge margin.

HOLE or CIRCLE PART?
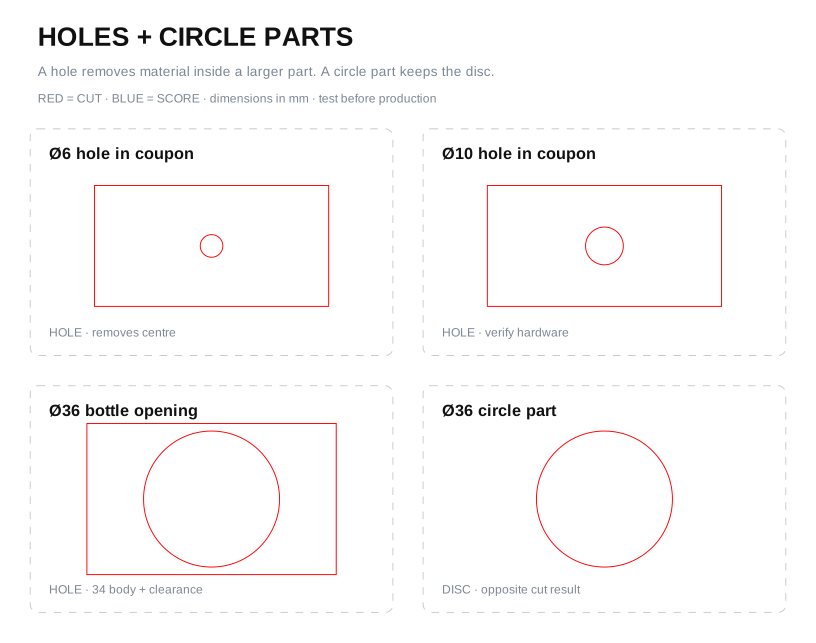
Hole palette comparing holes inside larger parts and retained circle parts

Same path shape. Opposite manufacturing intent. Name it.

First task

Measure three examples of the object. Record:

  1. widest controlling dimension;
  2. range of measurements;
  3. removal clearance;
  4. centre-to-centre spacing;
  5. remaining material at the edge and between openings.

Ready for the complete layout?

  • One opening coupon fits.
  • A hand can remove the object.
  • Neighbours do not collide.
  • Duplicates came from one checked original.
  • Labels match actual positions.

Project 4

Auto-shop pill-bottle organizer

Today we compare four assembly systems for the same storage need.

New skill: parts, interfaces, BOM, load path and assembly order.

Four reference systems

  1. Simple shelf rack
  2. Dowel-supported rack
  3. Reinforced wall rack
  4. Removable wall / bench rack

Use a reference to study relationships. Your measured bottle controls the file.

Example parameters

  • body Ø = 34 mm
  • cap Ø = 42 mm
  • radial clearance = 1 mm
  • opening Ø = 36 mm

opening = body + 2 × clearance

Cut one opening before four.

Assembly review
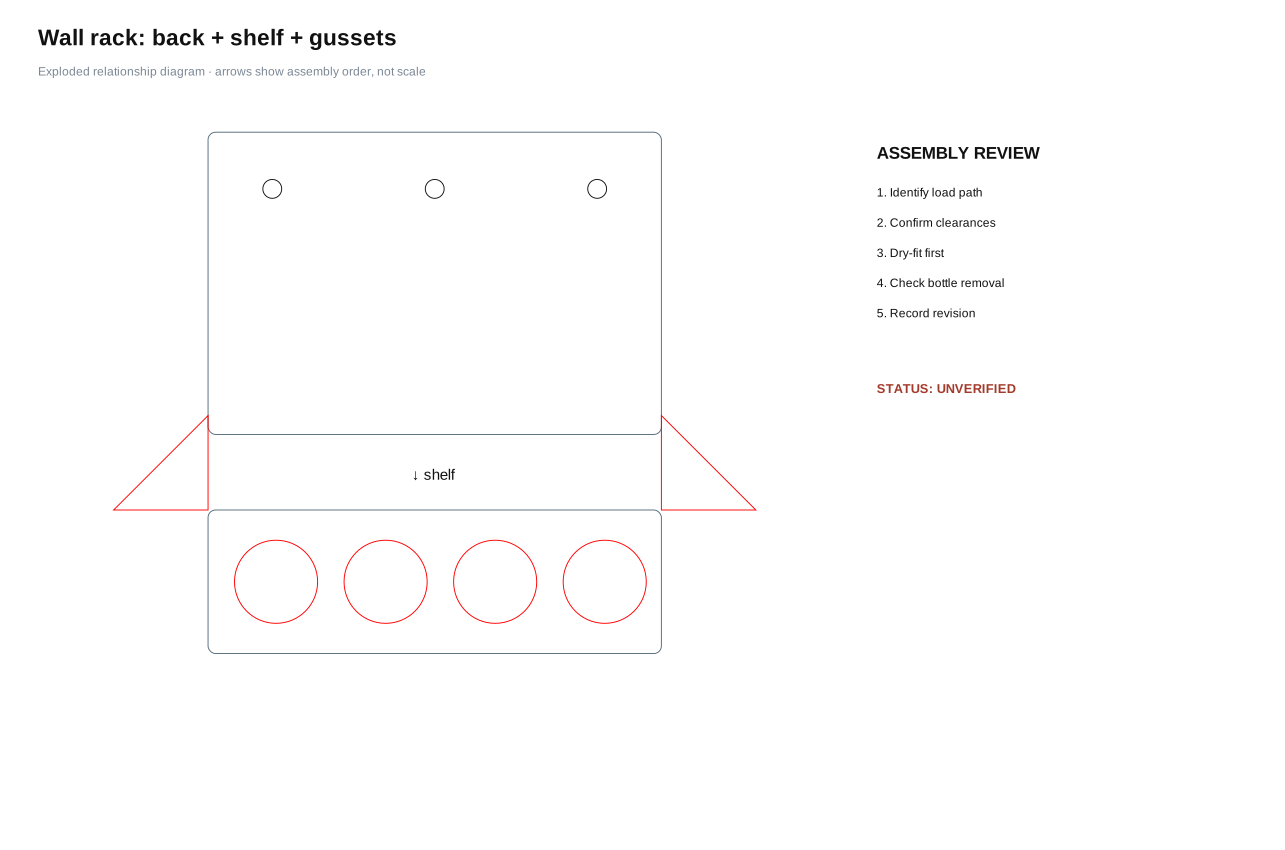
Exploded relationship diagram for a reinforced wall rack

What carries the load? What locates the parts? What can fail first?

Ready to fabricate?

  • measured bottle parameters replaced defaults;
  • BOM matches visible parts;
  • assembly order is possible;
  • fit coupon passed;
  • free-standing stability or wall plan is approved;
  • file still says unverified until the physical record exists.

Transfer

Your next organizer

Choose a real tool family. Repeat the same logic:

observe workflow → measure → plan views → use components → test critical feature → assemble → user test → revise

Evidence, not decoration

Hand in:

  • paper planning sheet;
  • editable SVG master;
  • fabrication/export file;
  • BOM or part list;
  • fit/stability evidence;
  • one clear revision statement.

Website code: AGPL 3.0. Educational content: CC BY-SA 4.0.

Educational content may be shared, copied, modified, and redistributed. Keep the CC BY-SA 4.0 licence and credit Andrew Andrade, andrewandrade.ca, and github.com/mrandrewandrade. Add your own name and links when adapting it. Sharing is caring.

The website code uses the AGPL 3.0, a copyleft licence: if you share modified code or run a modified version as a network service, you must make the corresponding source code available under the same licence.

 
  • References

  • Licensing